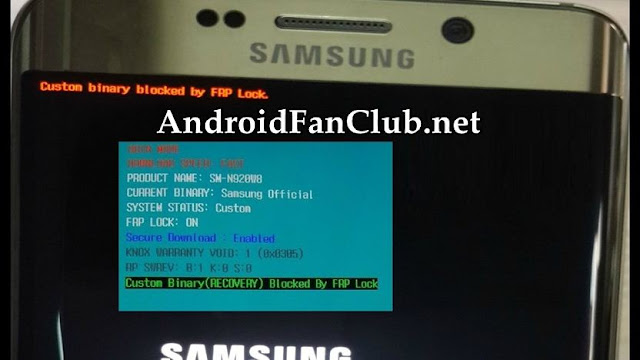
If you have just rooted your Samsung phone and a constant message of ‘Custom binary blocked by FAP lock‘ is popping on your screen, it means that you have flashed an unauthorized binary file on your phone and to ensure the phone’s security, the phone is preventing itself to boot, since it has detected an unauthorized and modified files. Also check out how to Remove or Bypass FRP lock / Google Account from Samsung Mobile Phones.

Now to fix this problem and to make the phone working again, there’s a method that you can perform on your Samsung device, however, which is not official and it is used only if you want to unroot or reinstall an official firmware in case you are using a Custom ROM.
Fix Custom Binary Locked by FAP Lock on All Samsung Phones
So, if you are ready to do it, here is a guide on how to flash Samsung Stock Firmware / ROM using Odin software to Fix Custom Binary Blocked by FRP or FAP Lock error.
Flashing Samsung Mobile Firmware Using Samsung Odin Software
Before getting into the process, let’s talk about the Odin software. Odin is actually the leaked Samsung software that lets the users install firmware and future updates right on your Samsung device. The software is available online as the third party software and is very powerful tool, so it should be used very carefully. If you want to Fix Custom Binary Blocked by FAP Lock on Samsung Galaxy S7 / S7 Edge / S8 / S8 Plus / Note 8, you should follow this guide instead.
Here’s how to use Odin to flash Samsung firmware update:
1: Get Samsung Odin on Your PC
So the first step to flash Samsung firmware using Samsung Odin Software is to get the software on your PC. As the software is available in the form of a zipped file, so you need to extract it, after getting it downloaded on your PC.
2: Get Samsung Drivers
In order to begin the process and to assist your computer in recognizing your Galaxy phone, you will need to install the Compatible Samsung Drivers according to your device model.
3: Boot the Samsung Device into Download Mode
So the next step is to boot your phone in the download mode. For this, hold down the “Power Button” and turn off your Samsung device. With the device turned off, press the “Power Button” + “Volume Down” + “Home”.
4: Connect your Phone to PC
Launch the Odin software on your PC and connect your device to the computer using the USB data cable. Once your phone is connected to the computer, you will be notified and the software will also detect the phone right away.
On the interface of Odin, there is a section named, “ID: COM”. There is a blank space underneath it, that will turn blue when your device is recognized.
5: Add the Samsung Firmware File to Odin
You need to add the firmware file to Samsung Odin, in order to flash it to your Galaxy device. After getting this done, you will be able to see multiple buttons particularly PDA or AP. Click on one of these buttons and add the tar.md5 file, from where you have saved it. You can download your Samsung Galaxy Phone stock firmware from SamMobile.com/firmwares.
6: Begin Flashing
Once you are able to see that firmware file is loaded onto Odin, you can press the “Start” button at the bottom of the application to begin the installation process.
7: Finishing the Process
The installation process will take several minutes and during the process, your device will restart several times. At the end, you will see the message saying “PASS” on a green background. This is the message notifying that the installation process is done. The device will be rebooted automatically and it would run on the newly flashed firmware.

Note that you have to match the firmware with the model number precisely, shown on the back of the cover. If not, you can face unwanted consequences and even damage to your phone. So, proceed at your own risk!


